Need to give your ceiling a smooth, seamless finish? Read on below for every step needed to plasterboard your ceiling.
Plasterboarding a ceiling may seem like a daunting home improvement project. Yet, if you learn how to do this yourself, you can save a load of money on labour costs.
Whether you're looking to remove an artex ceiling, replace damaged plasterboard, or repair a hole in the ceiling, plasterboarding is the answer.
And, unlike wet plaster, which is relatively difficult to handle, you don't need to worry about nuisances like how long plaster takes to dry.
From preparing the space to attaching the plasterboard and adding the finishing touches, we’ve got you covered in our step-by-step guide. Let’s do it!
It’s time to plasterboard your ceiling, but how do we actually do that? First, let’s check what you need.
Tape measure and pencil
T square
Utility knife
Stud finder
Temporary support frame (optional)
Plasterboard adhesive
Drywall screws
Drill or screwdriver
Plasterboard tape
Putty knife
Sandpaper
Paintbrush, primer, and paint
Remember: you can always hire a builder or plasterer to install plasterboard on your ceiling.
While this inevitably means higher house renovation costs, it's much less hassle and optimal results are assured.
You’ve gathered your tools and materials, it’s finally time – here’s every step you’ll need to plasterboard your ceiling.
If you've decided you'd prefer to use wet plaster, head on over to our guide on how to plaster a ceiling now.
Step 1: prepare the area
Plasterboarding might not be as messy as learning how to lay bricks, but it's still pretty messy!
Before you get started, you'll need to clear the space.
Remove any furniture and fixtures that can be moved, then cover the floor with a dust sheet to protect it.
You’ll also want to protect yourself from harm. Wear goggles, a dust mask, and suitable clothing, and you should be set.
Step 2: measure the ceiling
Next up, you need to make sure the plasterboard is the right size for your needs. These sheets come in various sizes so measure your ceiling to get an idea of what you’ll need.
Use a tape measure and note the dimensions of your ceiling. You can then plan how to arrange the sheets so that the joints are staggered.
Staggering means avoiding placing the edges of the boards directly in line with each other. This approach gives the plasterboard more strength and will prevent it from cracking.
Step 3: cut the plasterboard
Once you know your measurements, you can cut your plasterboard. Mark the plasterboard with a pencil and use a T-square to draw straight lines.
Next, cut along the line with a utility knife. Start by scoring the board and then snapping it along the line. Don’t rush this task or you may end up with jagged edges.
Having trouble? Read our guide on how to cut plasterboard.
Step 4: find the ceiling joists
Joists are wooden beams that support the ceiling. You will need to know where these are to attach plasterboard securely.
For this, you’ll need a stud finder. This tool locates framing studs behind the ceiling’s surface.
When you’ve found the joists, mark their position on the surface so you know where to attach the plasterboard.
Step 5: attach plasterboard to the ceiling
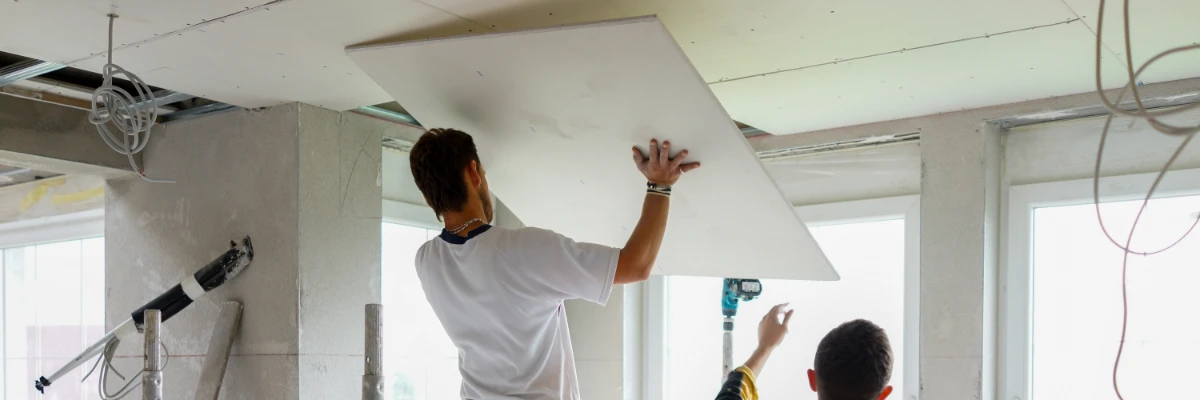
Plasterboard is heavy and awkward to handle. Don’t attempt to do this DIY task alone. You’ll need a hand from someone else or, in a pinch, a temporary support frame.
Start at one corner of the ceiling. Apply plasterboard adhesive to the joists and then lift the plasterboard into place.
Hold the board and secure it with drywall screws. Space the screws about 15 cm apart along the edges, and 30cm apart across the middle.
You’ll probably need your helper to hold or secure the board with screws, while you take on the other task.
Make sure that the screws sit just below the surface of the board but not too deep. Going too deep could ultimately damage the plasterboard.
Stagger plasterboard on your ceiling
While following the above instructions, make sure you stagger the sheets. That means making sure the edges of the boards don’t line up with each other.
This technique distributes the weight more evenly, making the ceiling stronger. Additionally, it reduces the risk of cracks forming along the joints.
Take your time and double-check that each sheet is flush with the next, creating a smooth and even surface.
Step 6: tape the joints
When you’ve placed all the plasterboard sheets, it’s time to finish the ceiling. Cover the joints between the plasterboard sheets with plasterboard tape.
This part of the process prevents cracks from appearing in the future. Make sure the tape lies flat against the ceiling.
For more detailed instructions, read our guide on how to tape and joint plasterboard now.
Step 7: apply jointing compound
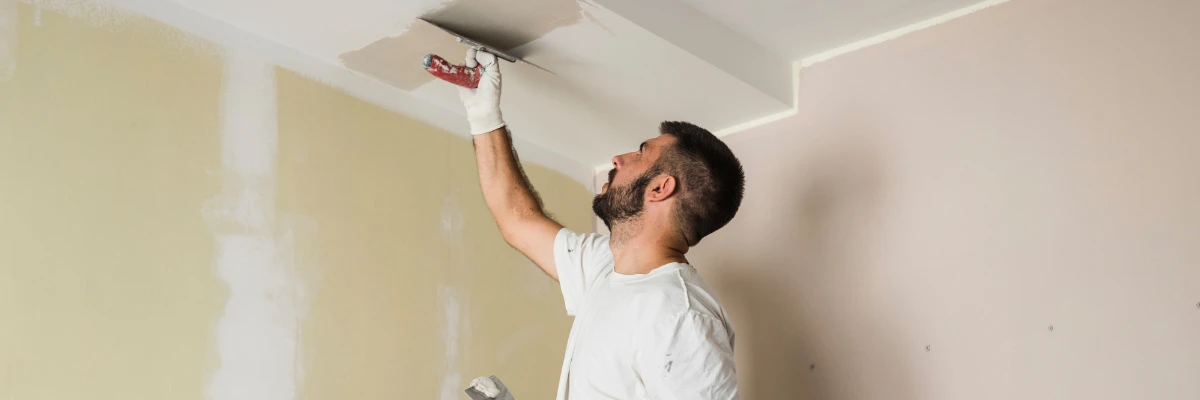
Next, cover the tape with a jointing compound. You can smooth it out with a putty knife. Feather the edges so that the compound blends seamlessly into the plasterboard.
When done well, this should completely hide the seam.
Step 8: sand the ceiling
When the compound is completely dry, use sandpaper or a sanding block to smooth out any bumps or ridges.
Sand until the ceiling is completely even.
Step 9: paint the ceiling (optional)
If you want to put the finishing touches on the ceiling, you can paint it. Prime and paint the area with your chosen colour to give it a fresh look.
Or – if you’ve had enough of DIY work – you can hire local painters or decorators for this final step of the project.

Now that you know how to plasterboard a ceiling, let’s take things to the next level. If your plasterboard ceiling is damaged or broken, you can replace it yourself.
Here are the simple steps that you should take to install new sheets:
Step 1: remove the old ceiling
Use a utility knife or crowbar to cut along the edges of the ceiling and remove the old plasterboard.
Precision is everything. Take your time and be careful when cutting the sheets – you don’t want to cause further damage!
Be aware of electrical wiring or fixtures hidden behind the ceiling. When you’ve removed the sheets, inspect the ceiling joists to make sure they're in good condition.
Step 2: install the new sheets
Clear the ceiling space to make sure it’s ready for the new sheets.
If nothing is amiss, prepare the area once again. Then, install the new plasterboard following the steps outlined above.
If only part of your ceiling is damaged, you may not want to rip it all out and start from scratch. In that case, you can use plasterboard to repair holes.
Let’s take a look at how to repair ceiling holes, plasterboard holes, and even large holes.
Repairing a small hole in the ceiling
Whether it's a small dent or a larger hole caused by a leak, you can fix it with ease. For small holes (i.e. less than 5 cm in diameter) repair them with jointing compound.
Clean the area around the hole, removing any loose material. Apply the jointing compound using a putty knife, pressing it into the hole and smoothing it out.
Let it dry, giving it plenty of time to set, and then sand it down until smooth. At this point, you can paint over the spot and it should look the same as the rest of the surface.
Repairing a hole in a plasterboard ceiling
Dealing with a larger hole in plasterboard? You will need to “patch” it. That means using a small piece of plasterboard to fill the hole.
Cut a square piece of plasterboard that is slightly larger than the hole itself. Position the piece over the hole and draw around it. Cut along these lines to remove the damaged section from your ceiling.
Fix a small piece of timber behind the hole to add some extra support, then screw it into place. Fit the new plasterboard patch in the hole and secure it with screws.
Finally, finish by applying plasterboard tape over the joints and covering them with jointing compound, as before.
When it’s completely dry, you can then sand the area smooth and paint. This will leave your ceiling with a flawless, uniform appearance.
Repairing a large hole in the ceiling
When you have larger holes in your ceiling, the process is similar to repairing smaller ones but on a bigger scale.
Start by cutting a replacement piece of plasterboard, large enough to cover the hole. Once again, you can use timber to make sure there is proper support behind it.
Fix the new plasterboard to the ceiling using screws. Depending on the size of the replacement plasterboard, you may need a second person to help you.
Next, use plasterboard tape and jointing compound to hide the joints, feathering the edges as you move along.
Once again, you’ll want to finish by sanding and painting, giving your surface a consistent appearance.

Now that you know how to plasterboard a ceiling, let’s talk about how you can maintain your plasterboard. There are a handful of things you can do to expand its lifespan.
Keep it as dry as possible
Plasterboard is sensitive to moisture. Dampness can lead to sagging, warping, or mould growth – even in a relatively short time frame.
Here’s how to prevent water damage on your plasterboard:
Fix any leaks in the roof, walls, or plumbing ASAP
Use moisture-resistant plasterboard (often called "green board") in areas with high humidity, like bathrooms and kitchens
Ensure proper ventilation in rooms prone to moisture
Repair small holes and cracks quickly
Small holes or cracks may appear in plasterboard. When you see these, you need to take action quickly.
Here’s how to repair them promptly to prevent further damage:
Use a jointing compound or filler to patch small holes or cracks (following the steps above)
Sand the surface after the compound dries and repaint to match the rest of the wall or ceiling
Fore more in-depth instructions, check out our guide on how to repair ceiling cracks.
By acting quickly, you limit the likelihood of needing to hire a handyman to repair more extensive damage.
Protect against any damage
Dents, scratches, and punctures can all be problems for plasterboard. This material isn’t the strongest and may break more easily than you think.
To prevent physical damage, do the following:
Avoid hanging heavy objects directly on the plasterboard without proper wall anchors
Use bump guards or corner protectors in high-traffic areas to prevent accidental damage
Watch out for “sagging”
Sagging is exactly what it sounds like. The plasterboard falls away from the ceiling, drooping in a manner that suggests potentially serious issues.
Check ceilings regularly for signs of this problem. It could mean that there is a structural issue, a failing adhesive, or excessive moisture.
When you notice the signs of sagging, you should:
Investigate the cause and address any water leaks or other underlying issues
Reinforce or replace the affected plasterboard if necessary
If you’ve got an issue with moisture, like a leak, you might want to hire a plumber to investigate the situation.
Touch up paint regularly
Over time, you might find that the paint on plasterboard fades or chips. Luckily, there’s a simple way to deal with this problem.
To keep your plasterboard ceiling looking new, do the following:
Touch up paint regularly, especially after repairing cracks or holes
Use a good quality primer and paint for a smooth, long-lasting finish
Need more information before you start plasterboarding your ceiling? Read on to find out more.
Is plasterboarding a ceiling always easier than plastering a ceiling?
Yes, in most cases, plasterboarding is generally easier for beginners and less physically demanding.
You don't need to worry about getting a perfectly smooth finish, like you would when learning how to skim a wall or plaster a ceiling.
Just attach the plasterboard, tape and joint the seams, then paint!
Can I plasterboard directly over an artex ceiling?
Yes, generally, plasterboarding over Artex is a common method for hiding the textured ceiling.
You'll need to make sure the existing surface is sound and fix the boards securely into joists or battens.
Before that, too, you'll need to check whether the Artex contains asbestos. If it does, you'll have to pay Artex asbestos removal costs to make the environment safe.
Will I need to remove the old ceiling before installing plasterboard?
Not usually, no.
If the existing ceiling is stable and there’s no sign of sagging or water damage, you can plasterboard directly over it.
When damage is present, you'll need to remove and replace the damaged sections. If it's starting to look challenging, you can hire a plasterer to take over.
Just make sure you look into how much plasterers cost before hiring anyone.
Learning how to plasterboard a ceiling can seem intimidating but, if you follow our guide, you can achieve great results.
By staggering your plasterboard, securing it properly to the joists, and applying a smooth finish, your ceiling will be ready for a fresh coat of paint in no time.
For bigger DIY projects (or if you’re having trouble!), why not let the experts take over? Use Yell to search for builders near you and find the right professionals for the job.
With our hiring tips and advice, it's the fastest way to find qualified professionals in your area!
Alternatively, you can post a free enquiry, provide a few quick details, and let contractors contact you by phone or email.
For more DIY advice, cost guides, and money-saving tips, check out the Yell blog today.